了解相关sprintboot框架搭建
sprintboot框架搭建与配置
java环境配置
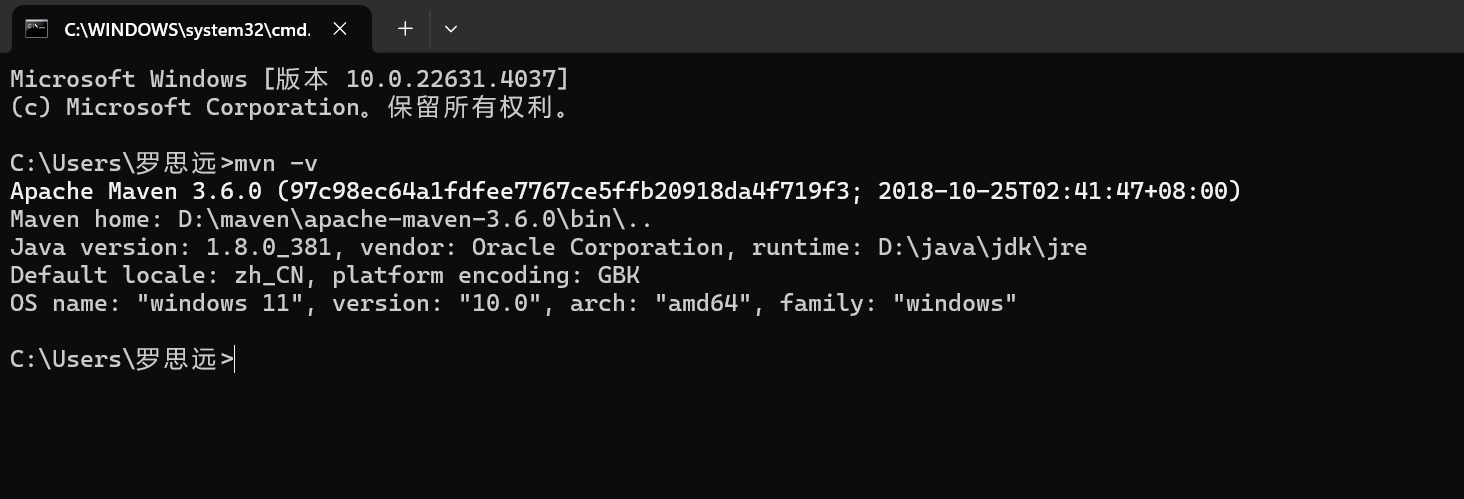
打开cmd查看java版本

IntelliJ IDEA开发环境搭建
具体搭建过程可以去网上搜教程
maven环境搭建
简介
Apache Maven 是一个非常流行的 Java 项目管理和构建工具。它被广泛用于管理和构建 Java 应用程序。Maven 的核心理念是为项目提供了一种统一的标准构建过程,这有助于简化项目的构建、依赖管理和文档生成等。(简单来讲就是管理依赖包的工具)
配置环境变量
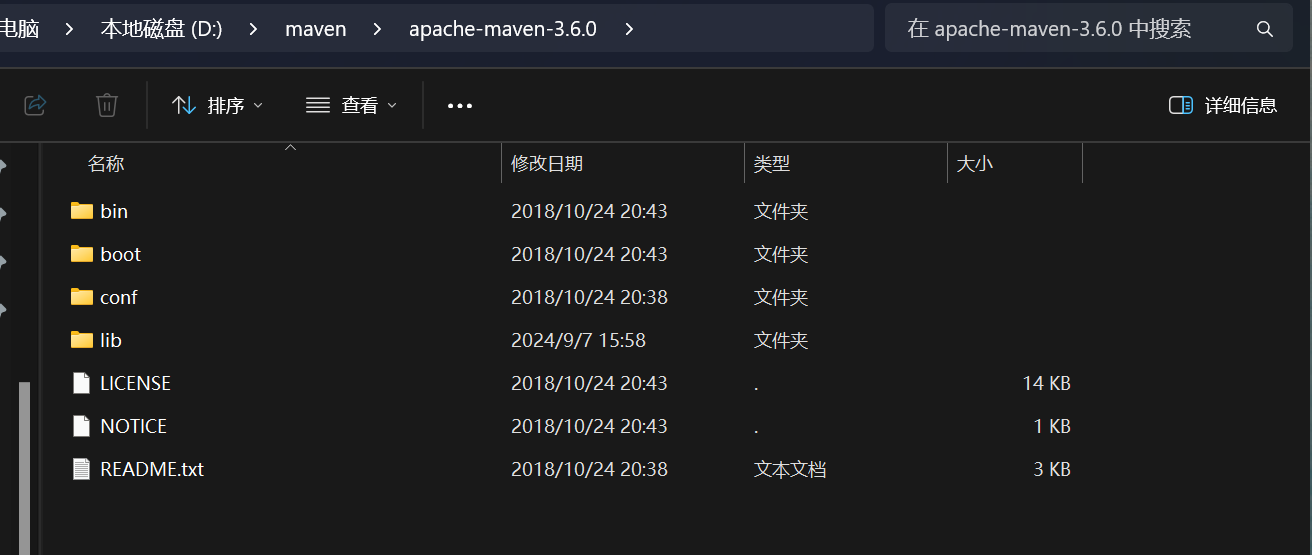
将压缩包解压到不含中文路径的或空格的文件夹
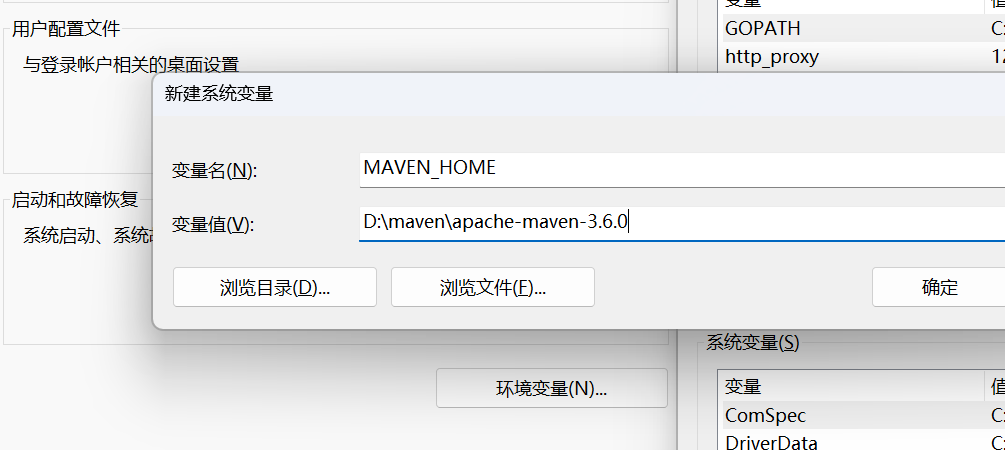
然后将maven的安装目录配置到系统环境中
建好后再去Path添加环境变量
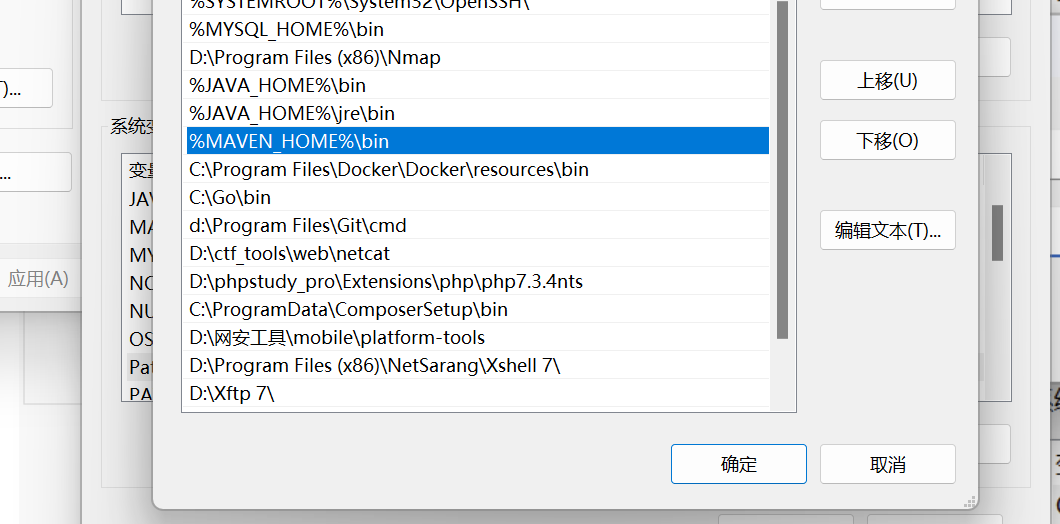
环境变量保存好后,去验证一下是否成功
修改maven仓库下载地址
打开apache-maven-3.6.0\conf下的settings.xml,这里改为阿里云的仓库和163仓库
全局搜索mirror将原来的镜像换成下面的即可
1
2
3
4
5
6
7
8
9
10
11
12
13
14
15
16
| <mirrors>
<mirror>
<id>nexus-aliyun</id>
<name>Nexus aliyun</name>
<url>http://maven.aliyun.com/nexus/content/groups/public/</url>
<mirrorOf>central</mirrorOf>
</mirror>
<mirror>
<id>nexus-163</id>
<mirrorOf>*</mirrorOf>
<name>Nexus 163</name>
<url>http://mirrors.163.com/maven/repository/maven-public/</url>
</mirror>
</mirrors>
|
创建使用maven管理的项目
我们先新建一个项目
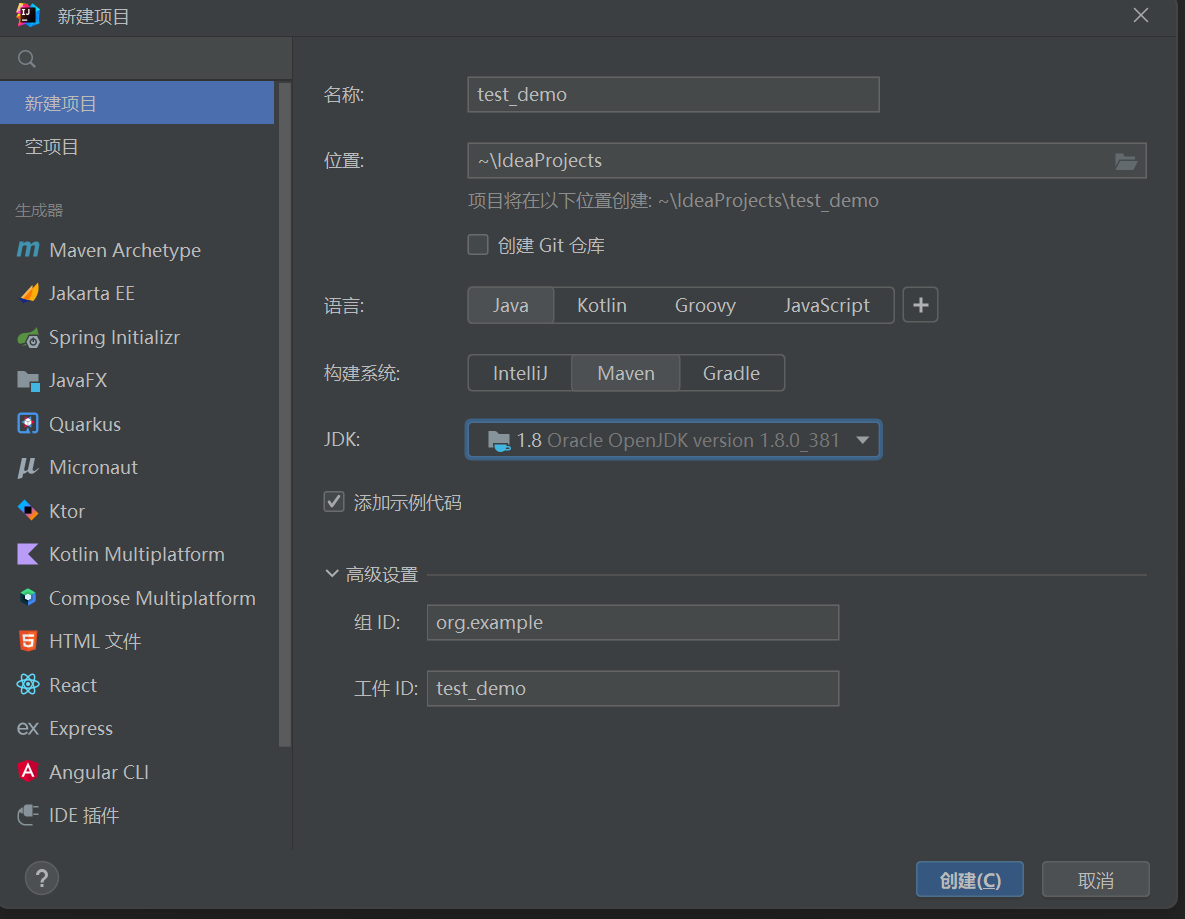
选择好maven和我们安装好的JDK,点击创建,可以看到我们项目结构和之前创建的项目有些不同
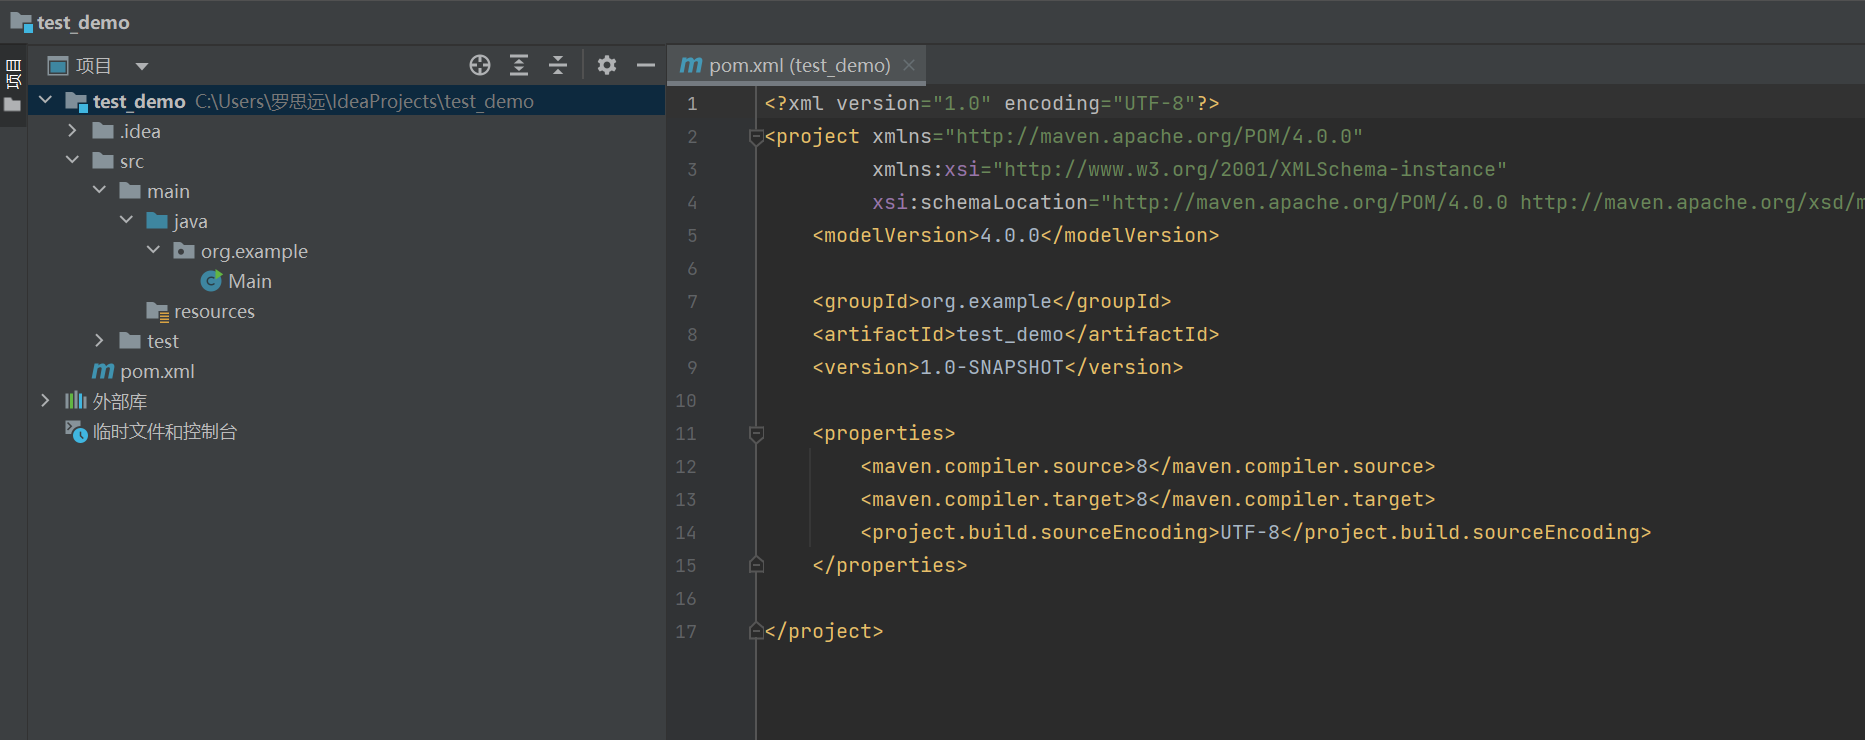
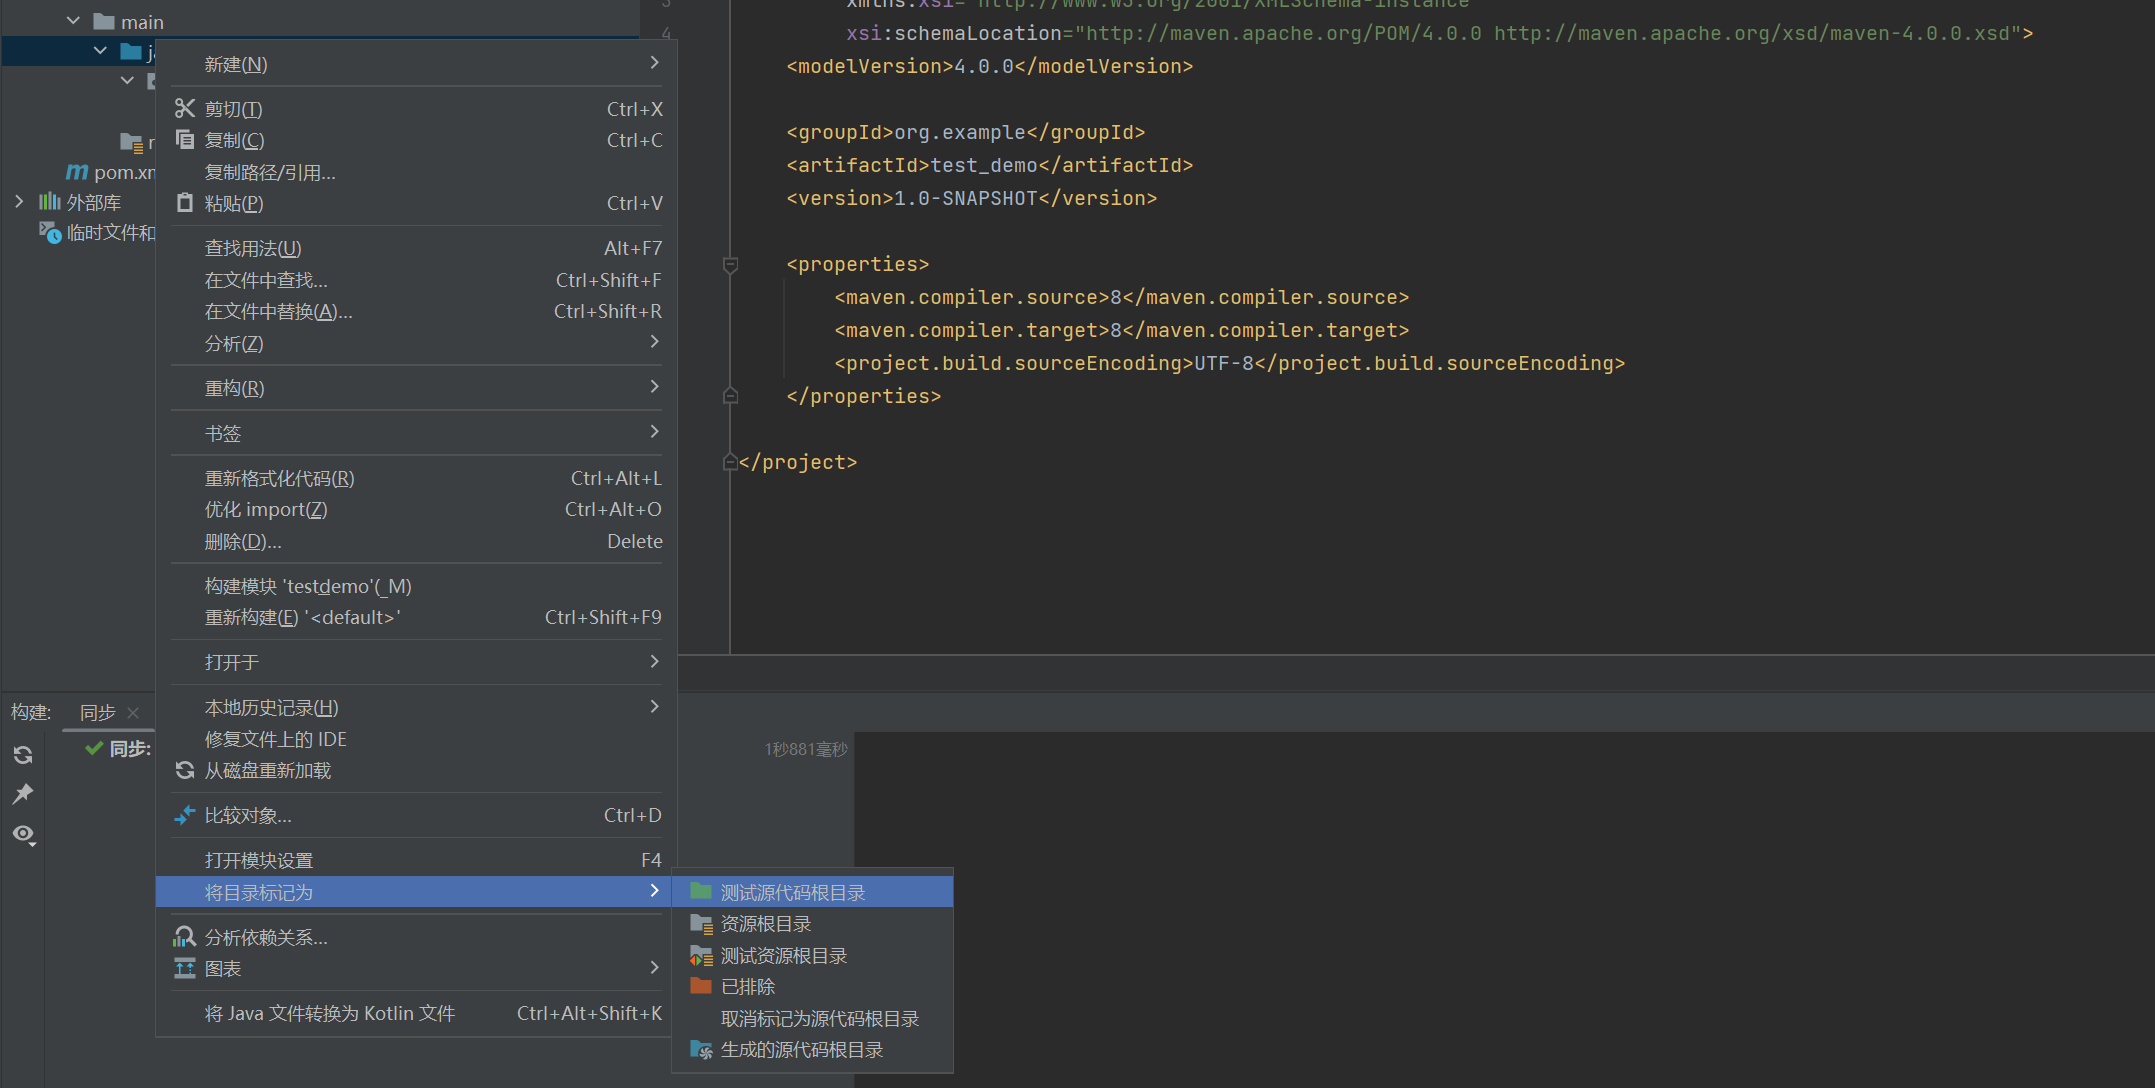
和main目录并排的test没有用,我们删掉即可。然后把java文件夹改为根目录
现在IDEA帮我们创建了一个简单的pom文件
1
2
3
4
5
6
7
8
9
10
11
12
13
14
15
16
17
| <?xml version="1.0" encoding="UTF-8"?>
<project xmlns="http://maven.apache.org/POM/4.0.0"
xmlns:xsi="http://www.w3.org/2001/XMLSchema-instance"
xsi:schemaLocation="http://maven.apache.org/POM/4.0.0 http://maven.apache.org/xsd/maven-4.0.0.xsd">
<modelVersion>4.0.0</modelVersion>
<groupId>org.example</groupId>
<artifactId>test_demo</artifactId>
<version>1.0-SNAPSHOT</version>
<properties>
<maven.compiler.source>8</maven.compiler.source>
<maven.compiler.target>8</maven.compiler.target>
<project.build.sourceEncoding>UTF-8</project.build.sourceEncoding>
</properties>
</project>
|
我们改成前面下的maven文件,在idea右侧找到maven后,点开小螺丝把配置更改为我们自己的配置
需要选中刚才安装的3.6.0的maven的版本,settings.xml也需要换成刚刚改的
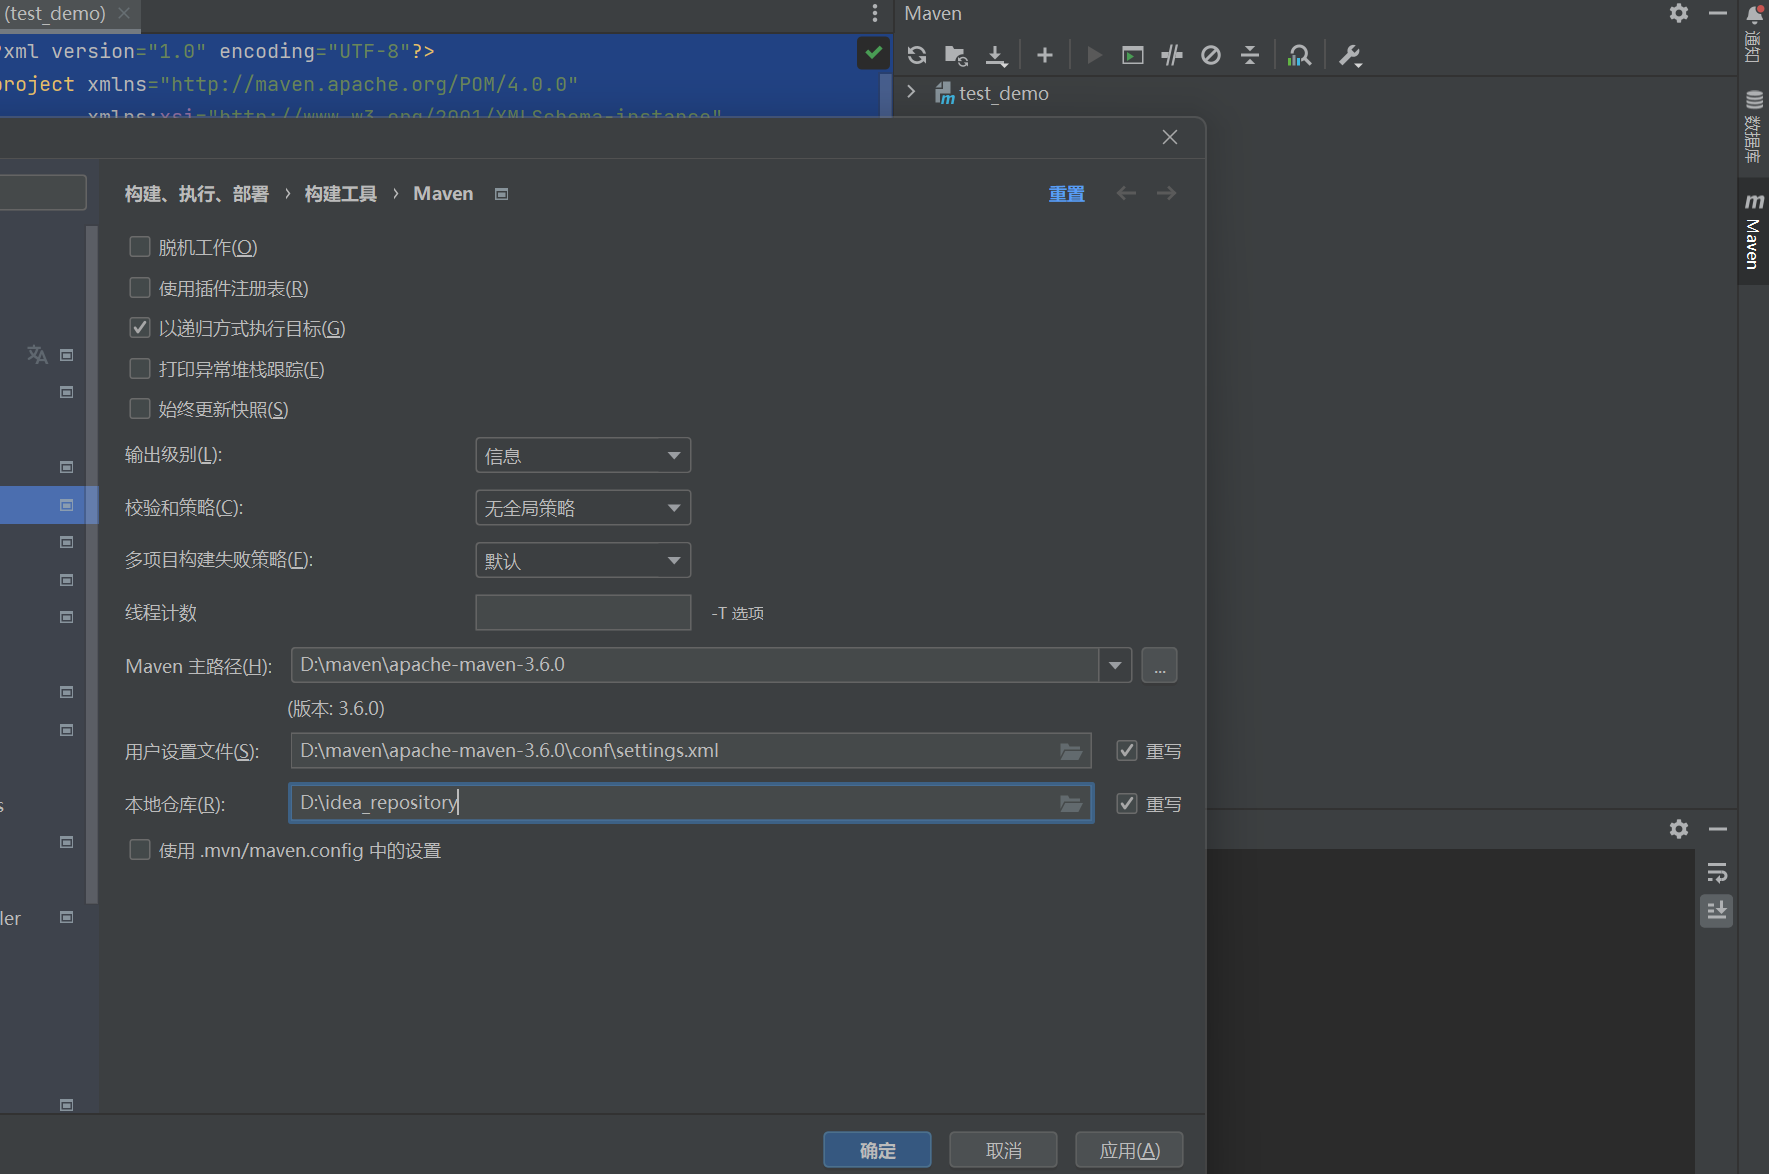
然后点击重新加载所有Maven项目即可
springboot项目搭建
导入依赖
我们使用前面创建的项目对pom.xml文件进行修改
1
2
3
4
5
6
7
8
9
10
11
12
13
14
15
16
17
18
19
20
21
22
23
24
25
26
27
28
29
30
31
32
33
34
35
36
37
38
39
40
41
42
43
44
45
46
47
48
49
50
51
52
53
54
55
56
57
58
59
60
61
62
63
64
65
66
67
68
69
70
| <?xml version="1.0" encoding="UTF-8"?>
<project xmlns="http://maven.apache.org/POM/4.0.0"
xmlns:xsi="http://www.w3.org/2001/XMLSchema-instance"
xsi:schemaLocation="http://maven.apache.org/POM/4.0.0 http://maven.apache.org/xsd/maven-4.0.0.xsd">
<modelVersion>4.0.0</modelVersion>
<parent>
<groupId>org.springframework.boot</groupId>
<artifactId>spring-boot-starter-parent</artifactId>
<version>2.4.0</version>
<relativePath/>
</parent>
<groupId>org.example</groupId>
<artifactId>test_demo</artifactId>
<version>1.0-SNAPSHOT</version>
<properties>
<maven.compiler.source>8</maven.compiler.source>
<maven.compiler.target>8</maven.compiler.target>
<project.build.sourceEncoding>UTF-8</project.build.sourceEncoding>
</properties>
<dependencies>
<dependency>
<groupId>org.springframework.boot</groupId>
<artifactId>spring-boot-starter-web</artifactId>
</dependency>
</dependencies>
<build>
<plugins>
<plugin>
<groupId>org.apache.maven.plugins</groupId>
<artifactId>maven-compiler-plugin</artifactId>
<version>3.1</version>
<configuration>
<source>${java.version}</source>
<target>${java.version}</target>
<encoding>${project.build.sourceEncoding}</encoding>
</configuration>
</plugin>
</plugins>
</build>
<repositories>
<repository>
<id>public</id>
<name>aliyun nexus</name>
<url>https://maven.aliyun.com/repository/public</url>
<releases>
<enabled>true</enabled>
</releases>
</repository>
</repositories>
<pluginRepositories>
<pluginRepository>
<id>public</id>
<name>aliyun nexus</name>
<url>https://maven.aliyun.com/repository/public</url>
<releases>
<enabled>true</enabled>
</releases>
<snapshots>
<enabled>false</enabled>
</snapshots>
</pluginRepository>
</pluginRepositories>
</project>
|
配置完pom.xml以后我们需要点开idea右侧的工具栏maven,点击刷新maven就会去镜像仓库下载文件
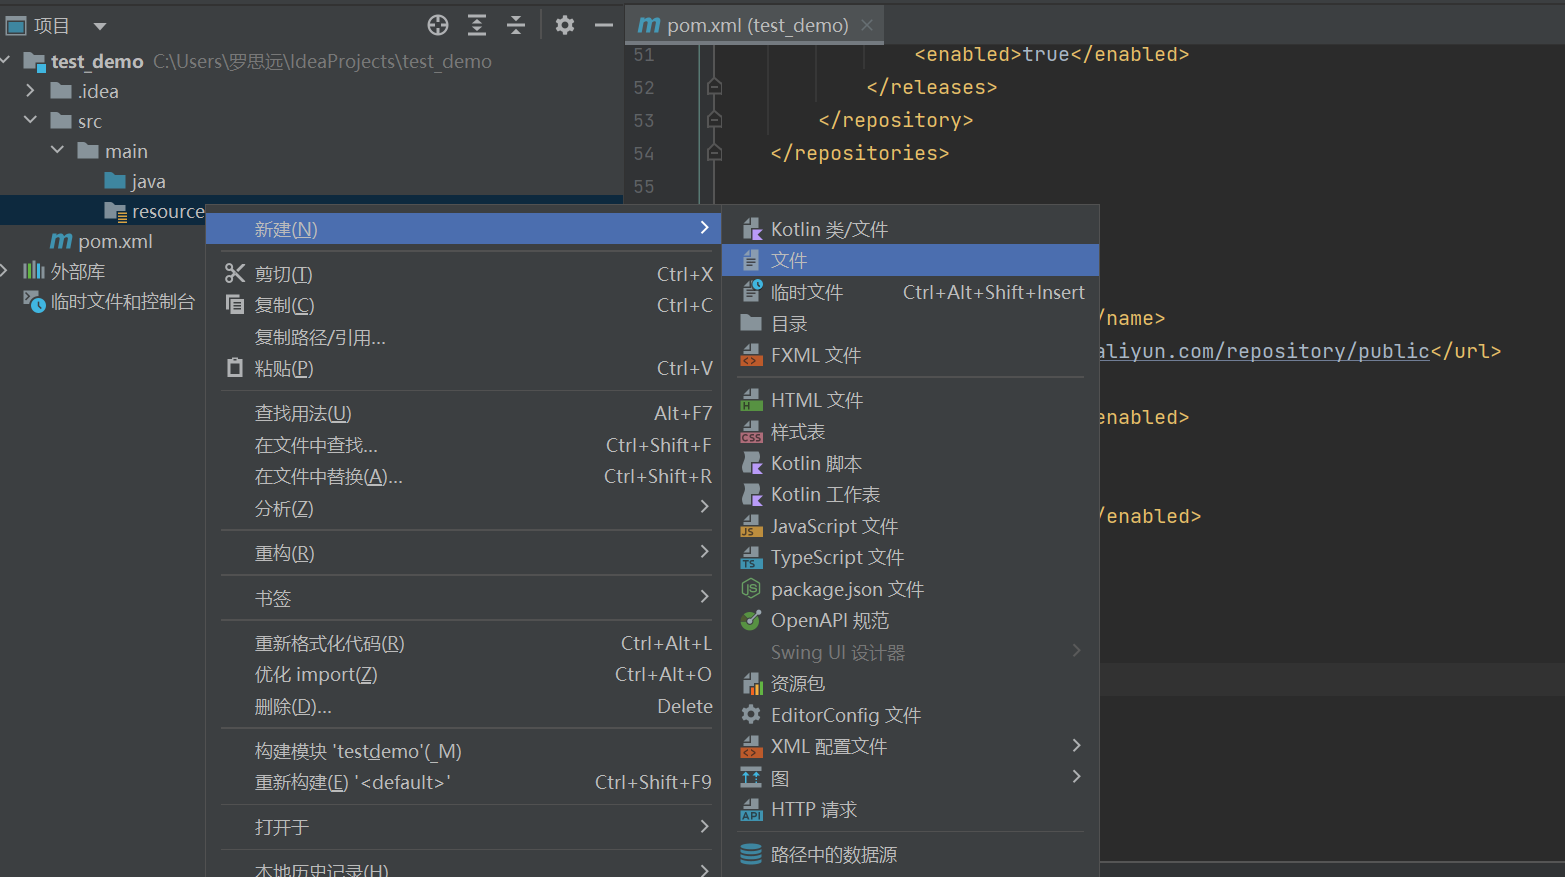
创建application.properties配置文件
然后在resources下新建一个spring配置文件,等有需要再写入内容
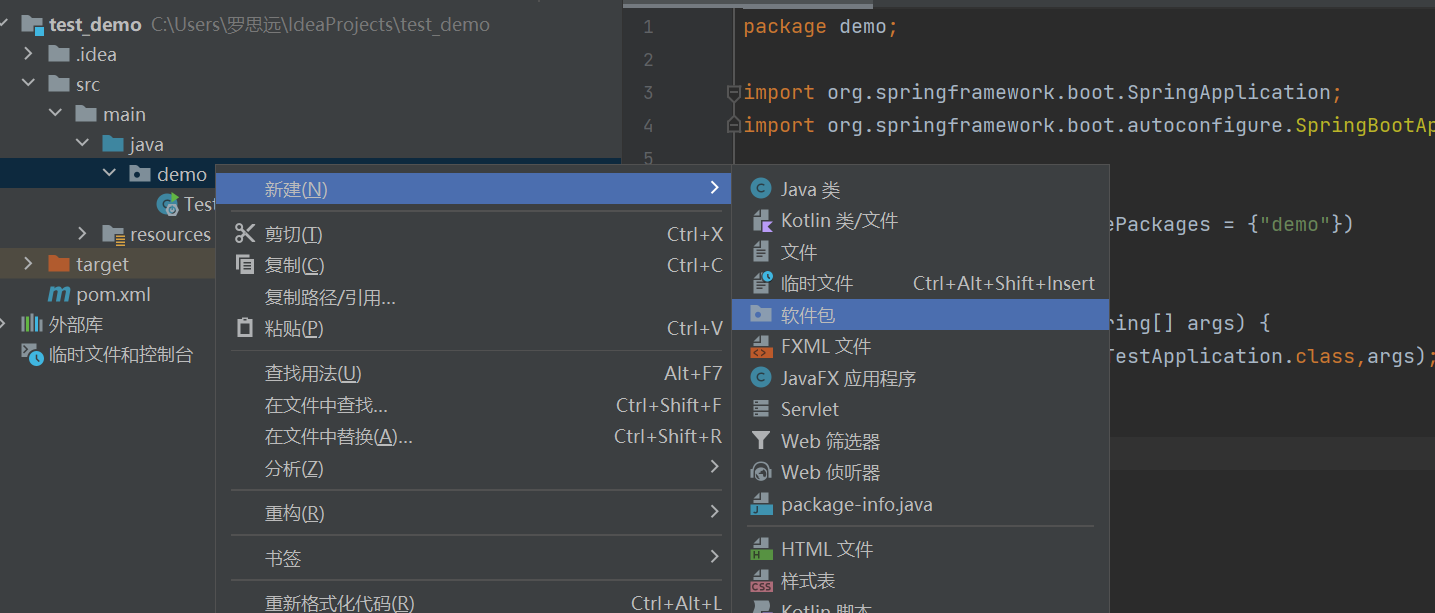
创建启动类
我们在demo包下新建一个TestApplication类,作为Spring Boot 应用程序启动类,用于启动整个 Spring Boot 应用
1
2
3
4
5
6
7
8
9
10
11
12
| package demo;
import org.springframework.boot.SpringApplication;
import org.springframework.boot.autoconfigure.SpringBootApplication;
@SpringBootApplication(scanBasePackages = {"demo"})
public class TestApplication {
public static void main(String[] args) {
SpringApplication.run(TestApplication.class,args);
}
}
|
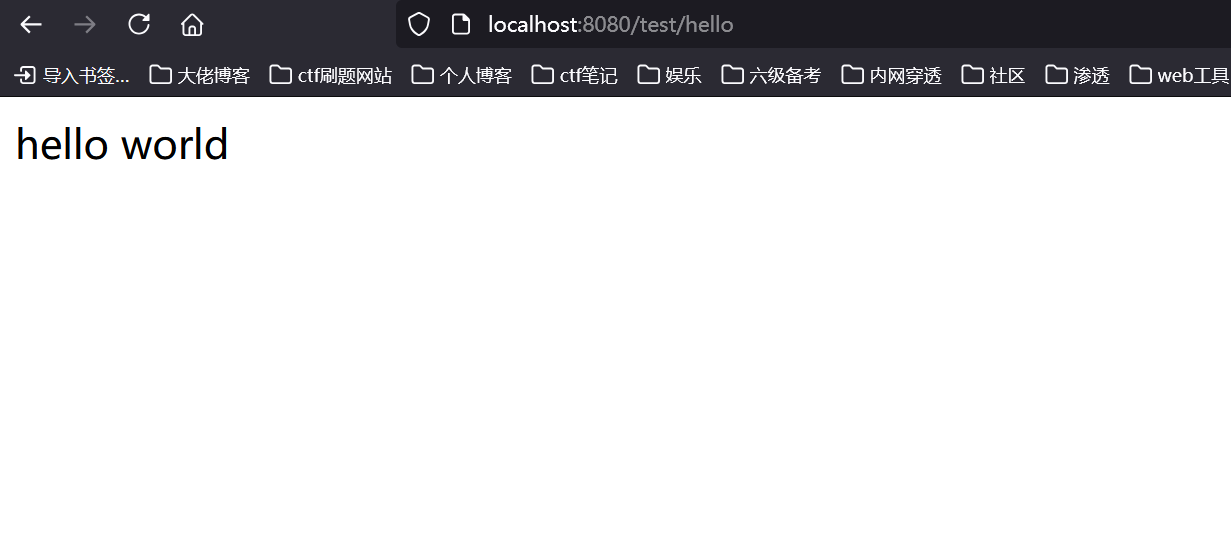
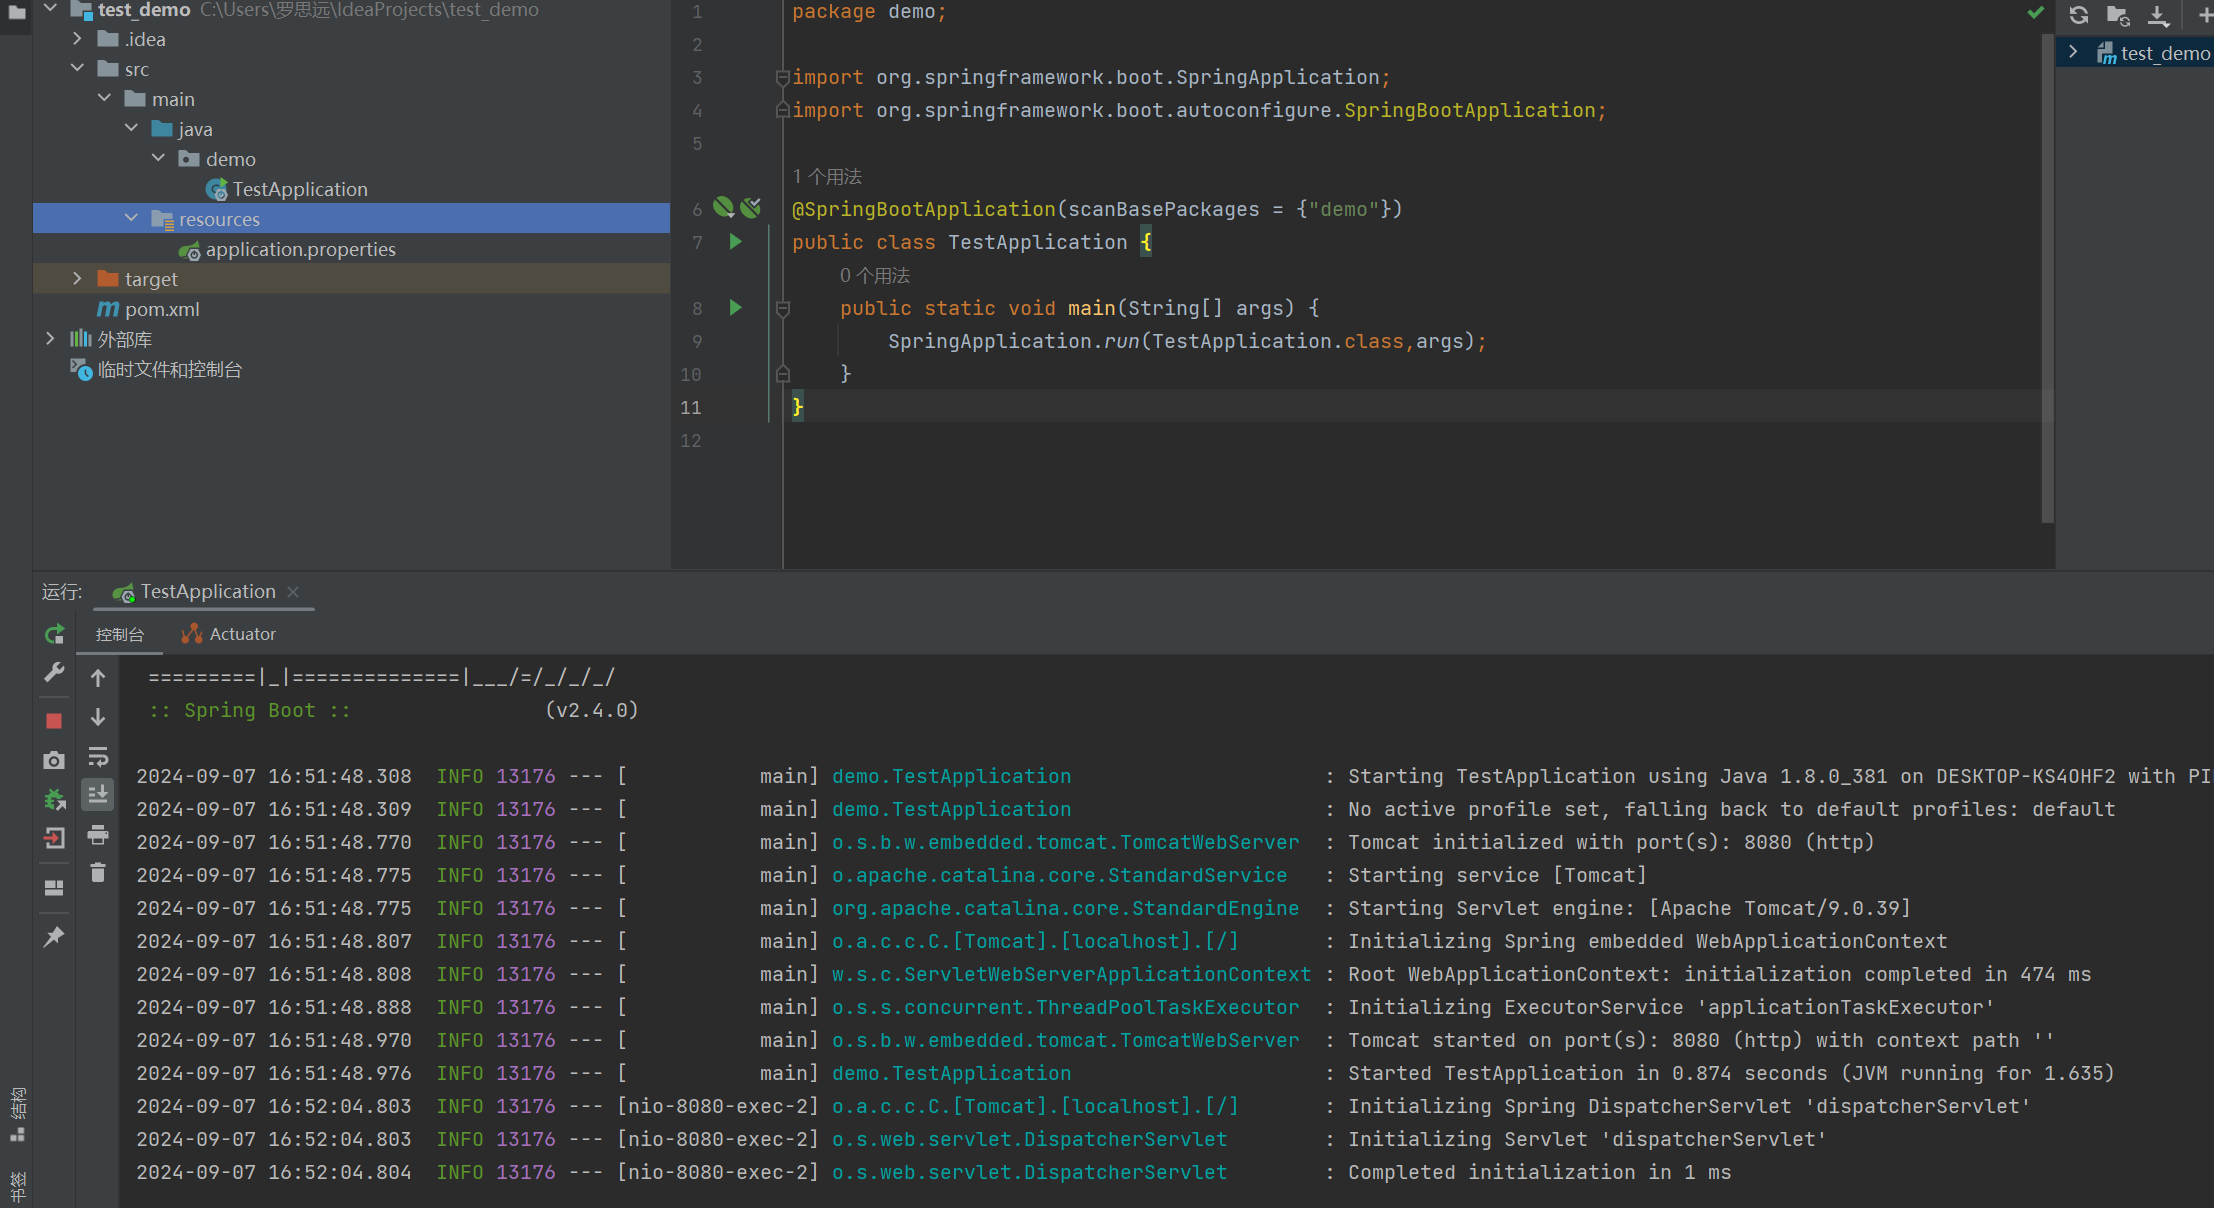
右键run一下,成功运行
springboot常用配置以及常用注解介绍
常用配置
server.port: 设置服务器监听的端口号。server.context-path: 设置项目的前缀
常用注解
@SpringBootApplication:
- 标记为主配置类,它结合了
@Configuration、@EnableAutoConfiguration 和 @ComponentScan 注解的功能。
@Configuration:
- 标记类为配置类,用于定义 Spring Bean 的配置。
@EnableAutoConfiguration:-
@ComponentScan:
- 用于指定要扫描的包,以发现和加载带有
@Component、@Service、@Repository 和 @Controller 等注解的类。
@Component、@Service、@Repository、@Controller:
- 分别用于标记组件、服务层、数据访问层和控制器层的类。
@RestController:
- 用于标记 RESTful 控制器类,它结合了
@Controller 和 @ResponseBody 注解的功能。
@Autowired:
- 用于自动装配 Bean,可以应用于字段或构造函数。
@Value:-
@EnableScheduling:-
使用springboot创建一个网络接口
在上一个springboot项目的基础上我们继续配置,首先在配置文件 application.properties中添加以下内容
1
2
3
4
5
| #将部署在服务器的 /test 路径下,所有访问该应用的请求都需要通过这个前缀来路由
server.servlet.context-path=/test
#项目端口号,若默认端口8080冲突则可以添加此配置修改
server.port=8000
|
在demo包下创建test包
然后继续在test包新建一个controller包,然后在目录下新建一个TestController类,写入以下代码
1
2
3
4
5
6
7
8
9
10
11
12
13
| package demo.test.controller;
import org.springframework.web.bind.annotation.RequestMapping;
import org.springframework.web.bind.annotation.RestController;
@RestController
public class TestController {
@RequestMapping("/hello")
public String Hello(){
return "hello world";
}
}
|
运行代码,然后访问/test/hello即可